Showing posts with label Silhouette. Show all posts

Saturday, March 26, 2016

Some Print and Cut cards using my Cameo

Hello! I wanted to share a few cards I made the other night using the Print and Cut feature of my Silhouette Cameo. I found some awesome designs by Amy Tangerene, Amanda Arneill, and Digital Pink Ink in the Silhouette Online Store. I was excited to put them to use. I have been going back and forth lately thinking about learning how to do brush script and calligraphy. But alas, I just don't have the time for another hobby - and this one takes alot of practice to get good! So I was excited to see so many brush script designs in the Silhouette Store. I especially like the ones by Amanda Arneill.
These first three cards use a background image from Digital Pink Ink, and the script by Amanda Arneill. When matted with a black piece of cardstock, I thought it really made the sentiment pop. I just designed these three cards in the Silhouette software, printed them out and matted them on black cardstock. So easy!


 The next two cards use a Print and Cut image by Amy Tangerine. The first card pairs this image with a paint stroke from Wet Paint by Papertrey Ink. I was thrilled to be able to pretty closely match the colors in the focal point with PTI colors! The sentiment here is stamped using the Sophisticated Script stamp set by Concord and 9th. LOVE that set!!
 The second card uses another Print and Cut image by Amy Tangerine. I stamped some Hawaiian Shore cardstock with the flower from Friends 'Till The End by PTI in the background. Love how bright and cheerful this looks!
Thanks for stopping by!


Thursday, August 28, 2014

Using Your Silhouette to Make Quilt Stencils - Henry's Quilt

Hello! I have been working on a nautical quilt for my grandson, who will be born in October. Henry's room is decorated in a nautical theme, so I chose a boat quilt pattern. I pieced the quilt in two fabrics - a white muslin and a navy blue print. I usually wait until the quilt is pieced before I start thinking about the quilting. I know, that's not the best practice, but that's usually how I operate. So once this quilt was pieced, I started trying to figure out how to quilt it.


I started by quilting in the ditch (or close to it) for the main boat blocks, and around the borders. I then turned the quilt over to look at the back. It seems like I needed a good bit more quilting, so I started thinking of other options. I have a Silhouette Cameo cutting machine that I use alot in my papercrafting, and I have tons of designs for it downloaded from the Silhouette store, as well as other sources. I started browsing my Silhouette library as well as the online store for nautical images. These are the ones I found that seemed to be appropriate for the spaces I needed to fill.
These are the designs from the Silhouette store.

Wave border: #63263, Whale: #58186, Anchor: #58517, Oar: #1427, Flourish: #19009

I measured each space on my quilt that I wanted to put these designs, drew a rectangle or square that size on my mat in the Silhouette program, then sized each image to fit that shape.  Here is a screen shot of this process:

Next, I deleted the rectangles and cut the shapes out of a sturdy cardstock. I used this cardstock to mark the designs on my quilt. I then quilted each design using free motion quilting, which I was already pretty much familiar with. I just went slow and took my time stitching each design.
Although most of the quilting is white on white, it is still noticeable - especially on the back.
Here are some pictures of the quilting.

The wave border segment underneath each boat.

The anchor in between sailboats.
The individual whale in the border
 The oar (in the blue rectangle), and the whale border
The flourish wave in the corners
I also embroidered Henry's name on the large boat, as you can see in the picture above. Overall, I am pleased with how this quilt and the quilting turned out. I am kind of wishing I had used a thread with a little contrast for the quilting though, so it would stand out a bit more. I was just afraid it would overpower the boats, so I used white.

Hope you've enjoyed this post on using your Silhouette (or any other cutting machine) to cut designs to use as quilt designs. It's opened up a whole new world of designs for me!

Thursday, June 19, 2014

2014 Father's Day cards

Hello! I wanted to share the Father's Day cards I made this year, mostly using cut files from the Silhouette store. The first one is for one of my son-in-laws. He is very handy around the house and there isn't a tool he doesn't have. I thought he would enjoy this card, along with a Home Depot gift card.

 And this next one was for my second son-in-law, who loves to grill outside. They eat alot of really healthy food, thus the artichoke on the inside. He also got a Home Depot gift card.
 Back of card


 This one is for my Father-in-law. He is pretty old school, and I made this from the Papertrey set Handy Hardware. I also used some patterned paper from a 6x6 pad for the rulers.
And last, but not least, is this one I made for my husband, who is an avid fly fisherman. I used a
WPlus9 set - Fish and More - for the accessories, and a free cut file for the vest, gotten from Dawn's blog here.
Did you make any Father's Day cards this year? Although my dad has passed away, I still make them for other Father's - the father of my kids, the fathers of my grandkids, and my husband's father. I think they deserve some special recognition of their day too! Have a great day!

Monday, February 3, 2014

A Party for a Princess


Hello!
I wanted to share some pictures (ok, ALOT of pictures) from my granddaughter's 1st birthday party. My daughter is very creative (and loves Pinterest), and decided to do a winter themed party for her daughter Sophie. She decided to have a Hot Cocoa Bar, a Smore Bar, and other platters of appetizers. The party was from 1:30-4:00pm. so we figured we didn't need to do a full lunch menu. One of the things I love, is that Katie involves me in her party planning. It gives me a chance to use the TONS of paper resources I have, and to feel a part of the festivities.

Hot Cocoa Bar

I gave Katie a recipe for a hot cocoa mix that I had used to send care packages to the kids when they were in college. It consists of varying amounts of powdered sugar, non-dairy creamer, cocoa, malted milk and powdered milk. We mixed up a huge batch, and set some aside for the party and put 2 servings in little half-pint jars for party favors. We also added extra chocolate chips, mini marshmallows, and a chocolate dipped spoon to the party favor. The hot cocoa turned out wonderful. Everyone said it was the best cocoa they ever tasted. I made homemade peppermint marshmallows, and chocolate dipped spoons and we had chocolate chips to add to your cup of cocoa. Here are some pictures of it.


 The half-pint jar with 2 servings of the mix, extra chocolate chips and mini marshmallows, plus a chocolate dipped peppermint spoon to stir it with.
 These were the tags I created and printed and cut using my Silhouette, which were attached to the jars.
Yum! Homemade peppermint marshmallows! They were sooo good!


The cocoa cups with sleeves, adorned with little circle tags that said "one".
And the toppings for the cups of cocoa.
These are all the little jars lined up on the counter ready to hand out to each family.


Smore Bar

We had little clay pots (which Katie painted) out on Katie's kitchen counter, that had Sterno cans in them. These were lit (with LOTS of adult supervision), and then marshmallows (we used store bought ones for these) were roasted to perfection, then sandwiched in between two graham cracker halves and a chocolate bar. Classic yummy goodness!
 Label for the Smore bar above, the marshmallows on a silver platter (actually from the dollar store!)
 The graham crackers on another expensive platter :)
 And the infamous Hershey bars (what would a smore be like without them?). There were also sticks to roast the marshmallows on.
The flower pot and the sterno can to roast the marshmallows. These sterno cans are made for doing this kind of thing - safe for indoors.
A picture of the roasting. That's my daughter Katie on the right in the blue. What a good mom she is!
Other snacks and table decorations

 Purple and white were the party colors.

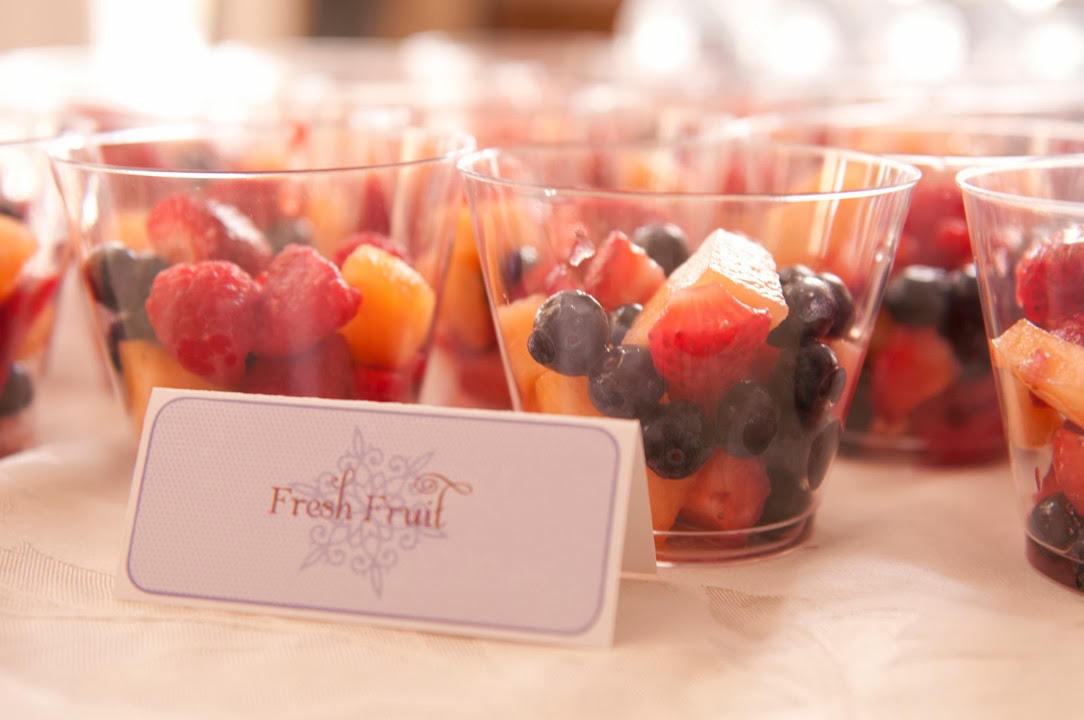
 Fruit cups for the kids
 Chocolate covered pretzels and star candy.
 Water and sparkling beverages.
 
 Katie purchased the cake pops. These turned out awesome! They matched the party colors and even added a sparkle. Very pretty! There were also several platters from Chilck-Fila to munch on.

 Party Banner and Hat

Here are some pictures of the banner and party hat I made Sophie. I did a post on the Princess book I made her here.
 The party hat. Try keeping a hat with an elastic band on a one year old for more than one minute!
 Sophie's banner - designed and cut on my Silhouette. Each letter has chunky white glitter on it. Vellum snowflakes behind each letter. I think Katie is going to hang this in her room now.


 A Happy Birthday banner for the entrance way. Also designed and cut on my Silhouette.

 Sophie's smash cake - BEFORE
 DURING
AND AFTER! She really got into it - you should have seen her squishing her fingers in it!

Wow! That was alot of pictures! Thanks for sticking with me to the end of this post! It was a great party and worth every minute we spent preparing for it. There were about 50 people (adults and kids) at the party and everyone had a great time.