Hello! I am trying to get a jump on my Valentines cards this year. I've had alot of fun mixing and matching Papertrey stamps on these cards. You can see a complete supply list at the bottom of this post. Thanks for looking!
This is my favorite card - it's for my 5 month old granddaughter - her first Valentines Day!
This card is for my husband. I didn't get the fillagre border die (yet!), but this uses the filagree stamp from the Love & Marriage set in the background. Don't you love the way the Fresh Alphabet fits inside the postage stamp?
This card is for my daughters and their husbands - I made two matching ones. It uses mostly the Love and Marriage set and Half & Half dies and stamp set. Inside is a sentiment from the Out on a Limb set -" Life isn't measured by the number of breaths we take, but by the numbers of moments that take our breath away" and then "Celebrate" from the same set.
This card is for my son, who just recently got his license. I just love that little dog from Tiny treats Valentines inside the Enjoy the ride car!
I have one more card to make - for my 9 year old grandson - harder to come up with something appropriate for that age. I'll post it when it's done.
Here's the supply list for the cards:
Stamp sets (all PTI)
Make a Wish
Rosey Posey
TT Valentine
Tag Its #11
Quilters Sampler Additions
Love & Marriage
Half & Half
Enjoy the Ride
Happy Days
Fresh Alphabet
Postmarks
Harvest Berries
Out on a Limb Sentiments (inside)
Mega TT Valentines (inside)
Dies: (all PTI) Heartprints, Heart Border Postage Stamp, Matt Stack #1, Spiral Notebook, Parisian Lace Doily, Half & Half, Enjoy the Ride.
Thanks for looking - hope you get your Valentines out soon!
Thursday, January 26, 2012
Rosey Posey cards
Hello! I am posting a couple cards I made using the Papertrey Rosey Posey set. This set is so versatile! I loved it from the moment I go t it, but even more once I saw the shading techniques Amber used on her card sets here on her blog. She is an amazing card maker, and so giving - she's provided so may templates for free on her blog - you NEED to check them out! Anyway, I thought I'd give this shading technique a try. I used copics instead of the colored pencils Amber used. The colored pencils probably would have given you a little more control, and I may have to give them a try at some point, but I like the way these turned out. It takes a while to do all the shading. I did a big 8 x 11 piece of cardstock and then cut it into quarters to place on the front of cards. Did I say it took quite a while to do all the shading??? But it was worth it! Here are my cards:
I used PTI Royal Velvet and Melon Berry cardstock for the card bases, Versamagic Tea leaves and Spring Pansy ink, and PTI melon berry and aqua mist ink. The ribbons were from an Offray outlet near me. Thanks for looking!
Tags for spring
Wow! It's been quite a while since I've updated my blog! Sorry about that - the holidays just got away from me. Since Christmas, I have begun painting the inside of our house. That's taken up alot of time too. But I've had time to craft in the evening - just haven't taken the time to photograph the cards until now.
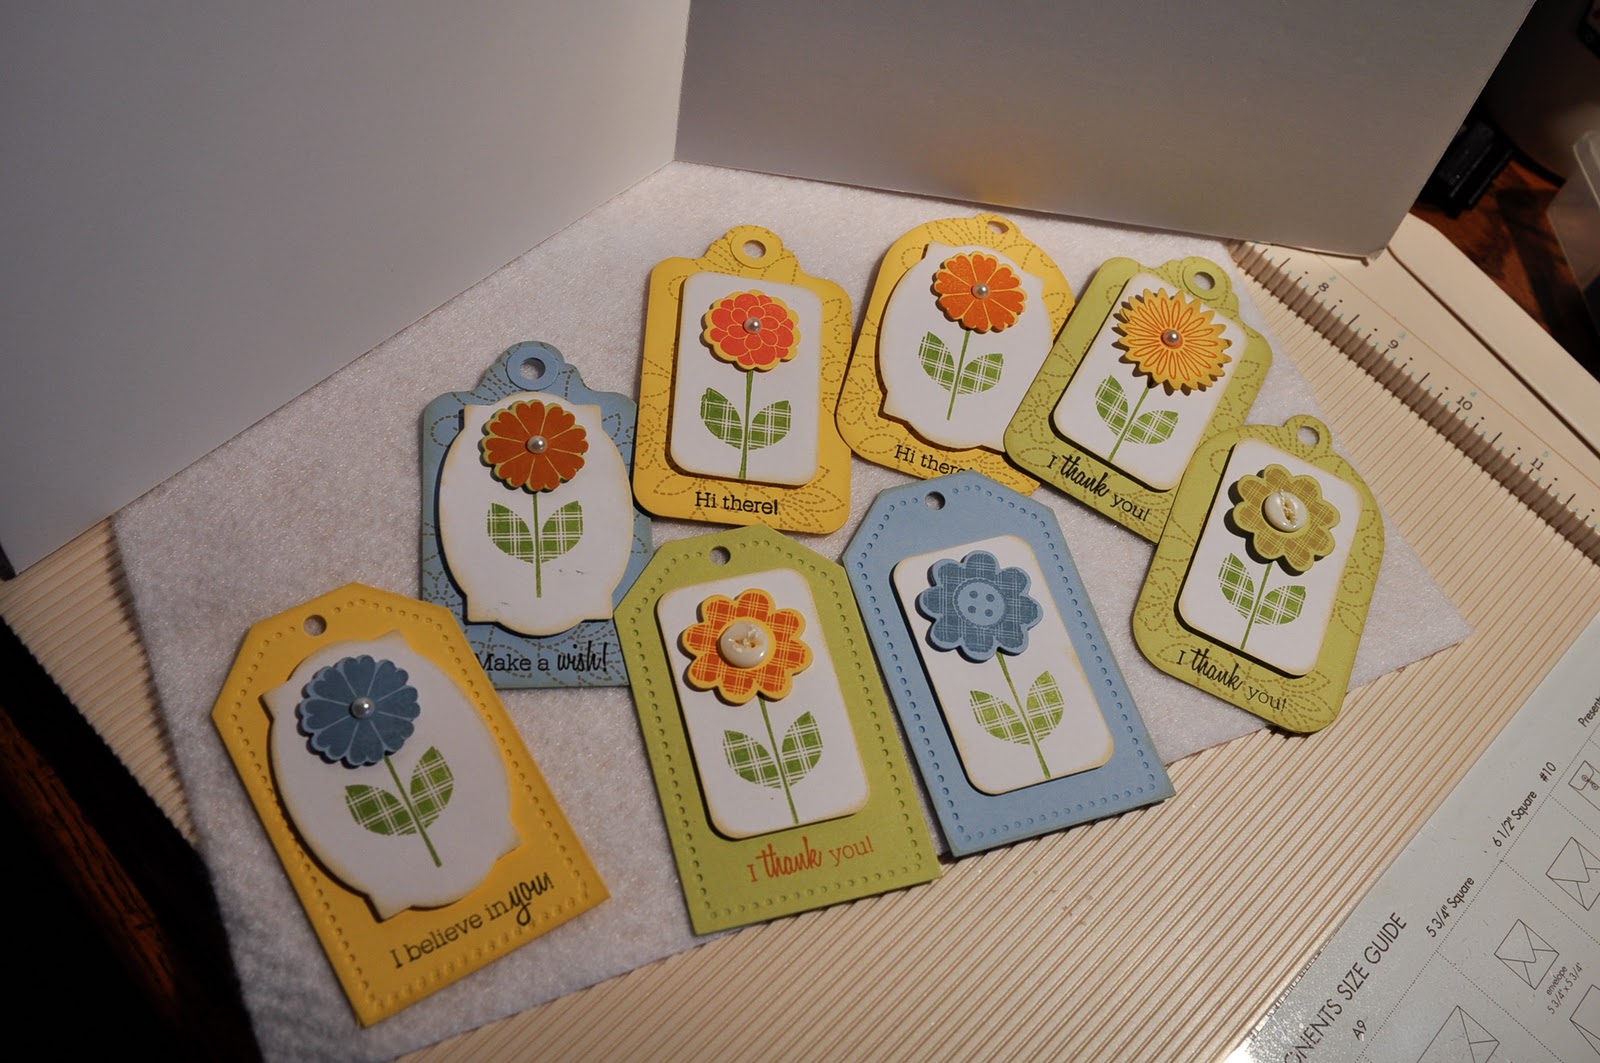
So here are some tags I've made for spring. I have collected most of the Papertrey Flower Fusion sets, but have had a hard time coming up with ways to use them on cards. I noticed a tag on Melissa Bickford's blog here using the flowers on tags. They are the perfect size for the Tag Sale dies by Papertrey. I always like to have some tags on hand to include with stamp sets I sell, or to use on packages. So I went to work and created a bunch of them. I just love the new FF#12 plaid flower top, and I paired it with the plaid leaves from Flower Fusion #6. And then I cut a bunch of tags and flower tops from different spring colored cardstock and went to town. Here's what I came up with:
I used Tag Sale Dies 1, 2 & 3, PTI cardstock in spring rain, spring moss, and harvest gold, various Flower Fusion sets, Versamagic Tea Leaves & Ocean Depth ink, PTI Canyon Clay, Spring Moss inks, misc pearls and buttons. It's nice to have a stash ready! Thanks for looking!
Tuesday, November 22, 2011
So much to be thankful for!
Hello! Happy Thanksgiving to you and your family! Thanks for stopping by my blog today. I am in the midst of putting the final touches on my Thanksgiving table decorations. It's so much fun to use the stamping supplies I have to decorate my home. I am thankful to the Lord for so many things this Thanksgiving season. Not the least of which is a new baby granddaughter! We are enjoying her so much.So many changes have taken place in our family this year, and I can think of several more coming up next year. Thanks be to God for His many blessings in our lives!
As I was decorating our table for Thanksgiving, I decided to use my Papertrey wine bottle tag for a chair tag. That was the reason I purchased this tag last month - we don't really drink wine or any alcohol to speak of, but there are many other ways to use this tag to decorate - like on packages, and at the table, on doorknobs, etc. Anyway, as I was making these tags, I decided to use the new PTI Make-it-Monday technique Betsy Veldman demonstrated at PTI this week. It is all about using sentiments in the background of your card (or in my case - tag). So I pulled out a generic "Thanks" stamp for my background, and used the hole punched out from the wine bottle tag top to create a Tag-it's base. I used Tag-it's #7 to stamp the tag and the pumpkin and the sentiment, and a Limitless labels die for the zig-zag mat behind it. I also used the leaf from the same Tag-it's to decorate name tags. Hope you enjoy!
Labels:
placecards,
PTI,
Thanksgiving,
wine bottle tag
Saturday, October 29, 2011
Making cards for my quilting retreat
These are all Birthday cards. I used PTI white cardstock, the Quilter's Sampler stamp set, and bakers twine from The Twinery.
Then I looked on Nicole Heady's blog at the release of the QS set, and fell in love with her miniature quilt she created with the set here. So I had to try my hand at it, given that I am a quilter. I ended up making two different sets, each card different, with 5 cards per set. Here is a sampling of them:
They are addictive! I just love making them, and think my next big project will be to make a larger one that I can frame and hang up in my quilting room. I made the miniature quilt using the directions Nicole gave in her blog. I'm charging $2 each or 6/$10 for the TBF cards, 4/$10 for the simpler quilt cards, and 5/$15 for these last miniature quilt cards. We'll see how they go.
I also took these same quilt blocks from the QS set, and scanned them in my computer to use to digitize them for machine embroidery. I recently purchased two Button-Up machines from Hope Yoder. After stitching out these designs, I made them into flatback buttons and glued them onto scissor zingers. I will sell them at the retreat also (at least I hope I will!). Here's a picture of them:
Thanks for stopping by!
Monday, October 24, 2011
Papertrey Blog Hop October 2011
Hello! I am participating in the Papertrey October 2011 Blog Hop. The photo below is supposed to be our inspiration for our Blog Hop card. You can get all the details over at Nicole's blog here.
I chose to key in on the prints on the fabric in the pumpkins, as well as the pumpkins themselves. Here's my card. I used PTI white cardstock, papers from the Fall Prints patterned paper, Tag Sale #4, sentiment from Take Three Fall, and the pumpkin is a Hero Arts stamp. The ribbon is from my stash. I also inked the edges of the paper with the tea dye duo. Hope you enjoy! Have fun looking at everyone's creation!
Tuesday, October 4, 2011
Papertrey Make It Monday #35 - Making Washi Tape - Card Three
Ok, this is my last card for this evening - I promise! This is just so much fun! Check out Nicole Heady's tutorial on making your own washi tape here on her blog. It's addicting though, so be forewarned! After making bunches of the tape, I thought maybe it would be fun to take a chunk of tissue (I had some cute polka dot tissue in my wrapping stuff), and cover the back with scor tape, then use some PTI die cuts to make washi flowers. I don't know if that counts as washi tape or not, but they sure turned out cute! Here's a picture of the tissue I started with:
I covered the back with scor tape (I guess you could use your Xyron machine if you have one - I don't). Then run it through your die cutting machine with the dies, just like you would with regular cardstock. Here's what I got:
Then, just use the flowers on your card. Note: it's a little tricky (but doable) to peel the tape off the back of these flowers because it's in pieces some places). So here's my finished card:
I used PTI sweet blush cardstock, Scor tape, the tissue from my stash, the Beautiful Blooms #3 dies, Around & About Sentiments stamps, and some fun pink fiber for my tie. Hope you enjoy! I know I did :)
I covered the back with scor tape (I guess you could use your Xyron machine if you have one - I don't). Then run it through your die cutting machine with the dies, just like you would with regular cardstock. Here's what I got:
Then, just use the flowers on your card. Note: it's a little tricky (but doable) to peel the tape off the back of these flowers because it's in pieces some places). So here's my finished card:
I used PTI sweet blush cardstock, Scor tape, the tissue from my stash, the Beautiful Blooms #3 dies, Around & About Sentiments stamps, and some fun pink fiber for my tie. Hope you enjoy! I know I did :)
Subscribe to:
Posts (Atom)