Thursday, April 23, 2015

Beach Notebooks

Hello! I have had way too much fun today making notebooks for our beach trip this summer! It all started out with this first notebook I made for my daughter's birthday this Sunday. She loves Lily Pulitzer, so the cover is printed with a LP design I got off the internet. We are going to the Outer Banks this summer in June with Katie and her family. There is always alot to pack and think through before the trip, and I thought a notebook would be a great place to write everything down in one place. I added the Beach Trip title, printed it out on medium weight cardstock, and mounted it to a heavier weight cardstock. All of these notebook pages, both in this notebook and the next, were cut using the Full page die in the Papertrey Divided die set. Both notebooks are bound with 1/2" coil binding from this website.
 I cut inside pages for this notebook out of regular college lined notebook filler paper. I thought the lines would be good for making lists of things to pack for the beach.
 At the back of the notebook, I printed out weekly calendar pages for the month of June. That way, when it gets closer, she can set certain tasks for certain days. These pages would also be good for journaling during the beach trip.
 This is the back cover of the notebook, with the dates of the trip. I probably should have thought of some neat quote instead, but oh well.

 I decided to add page bookmarks to her notebook. I used the Tabbed die in the Divided set, and numbers from the Listed stamp set.
 Stamped each one with Year Of Flowers: Marigold.
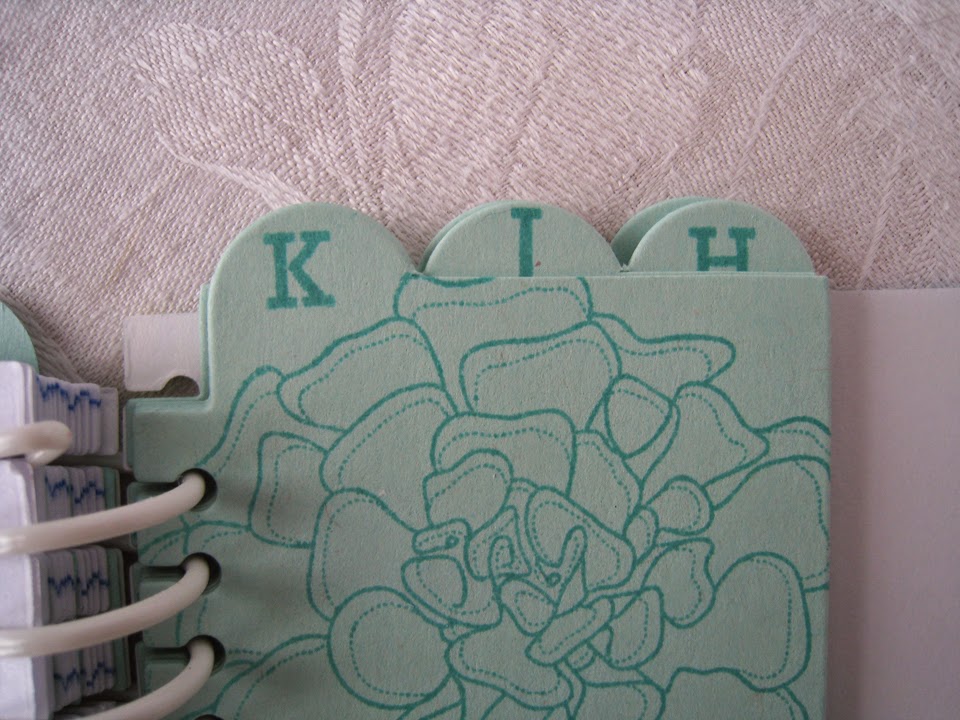
 Then I really got carried away, and added six more tabbed dividers in the back, one for each family member, with the first letter of their name stamped on the tab. I thought if she wanted to have a list for each person, she could use these. If not, she can just tear them out. Options are good. :)

 Then I decided that I needed a notebook too! :) I wanted mine to be more of a journal of the trip. I remembered this Graphic 45 pad of paper I had been hoarding - it's call By the Sea. It made the perfect cover!


My notebook is filled with three different types of paper. Here is a picture of the college ruled notebook paper.

 Then comes the graphic paper - perfect for playing connect the dots during vacation with our 12 year old grandson. I made a bookmark with the tabbed die using more of the Graphic 45 paper.
 Lastly, some pages of plain white copy paper - for doodling, zentangling and whatever else comes up. Another bookmark to mark this section.
 The back cover of this notebook - covered with more By the Sea paper.

Hope you've enjoyed my Beach notebooks! I know I will! :)


On a side track, here is the Lily Pulitzer card I made for my daughter's birthday. Again, printed LP design, with a sentiment from Graceful Greetings from PTI.
 And a seventh month birthday card for my grandson. Using Mama Elephant Ella and Friends stamps and dies. Smooshed watercolor background on watercolor paper. Thanks for stopping by!

Wednesday, April 22, 2015

Grandkids coloring book

Hello! I have been playing with the Edger die from my April Papertrey release order the past couple days. I would like to share a coloring book I made for my granddaughters. I was inspired by Keribear over on the Papertrey Ink forum when she made a notebook for a friend using the Basic Pages dies by Papertrey. I was also inspired by Betsy Veldman's notebooks during the release that had crayons included in her notebooks.  Unfortunately, the Basic Pages dies have been out of stock for months, so I made do with the new Edger dies I received in my order this month. It's my first book, so I learned some things along the way.
I learned that:
     - it would be alot easier not to have to line up the holes on the pages with the Edger die versus just cutting the entire page with one of the Basic pages die
     - still not sure what the best order for where the crayons should go in the book - (front or back)
     - you can put the Write Stuff holder dies closer together to fit more crayons
     -  need to come up with a way to crimp the ends of the coil so it doesn't unwind. Since it is plastic, bending it back doesn't work very well.

I used a Frozen image from the internet for my cover, and coloring pages for the inside pages from this website. It is my understanding that because these images are copyrighted, they are only for personal use, not for resale on any product. These little notebooks are for my granddaughters when we are out places and need to occupy them. :)
I used 1/2" white binding coils from here to bind the book together. Thanks so much to Keri and Betsy for their fabulous ideas and the information they provided!

Cover - image printed on cardstock and mounted to PTI cardstock

 Crayons with Write Stuff holders (wish I had put them closer together to include more crayons)

 Some of the coloring pages I printed on regular copy paper. Images from www.colouring-page.org.


      There are 25 coloring pages in this book. It measures 4.25" x 5.5". I used a 1/2" 4:1 pitch coil to bind it. I need to use my Envelope board to make a nice coordinating box to keep it in now. Hope you enjoyed it!

Friday, April 10, 2015

Card Quilting

Hello! I had some time to play today and thought I'd pull out Papertrey's Quilted: Spring set, designed by Betsy Veldman. The first thing I did was to cut the quilted square out of some Spring Rain patterned paper. I then glued the frame to a piece of white cardstock and stamped the quilting lines - also in Spring Rain. I loved the way the quilted lines turned out so much, that I decided to use the larger quilting stamp to create a background for my quilt square. I was amazed at how it turned out! Just like whole cloth quilt! I almost didn't want to cover it up with the quilted square. I also used the tiny little quilted flower stamp to stamp the centers of the quilting, rotating it 180 degrees and stamping it again to create the centers. Here is a picture of just the quilted background and the sentiment.
 I decided to go ahead and pop up the quilted square on the front. I just love the result! I guess I need to play with this set some more and see what I can come up with! This will be a birthday card for a dear friend that I quilt with. She will appreciate the "quilting" on it. :)
Hope you are having a fantastic day! Thanks for stopping by!

Sunday, April 5, 2015

Happy Easter!

As I sit here this beautiful sunny morning, listening to the birds chirp and waiting to go to church, I wanted to share with you all the Easter card I made for friends and family this year. I think it sums up today.
I am so thankful for my Savior - Jesus Christ - and for what He sacrificed for me! And His sacrifice was perfect and He was raised from the dead to live in heaven once again with His Father. One day I will spend eternity with them also! What a beautiful truth! Happy Easter - He is risen - He is risen indeed!

Friday, April 3, 2015

2015 Easter Crafts

Hello! I wanted to share some of the crafts and food I have been working on for our Easter celebration this year. We are celebrating down at my daughter's house - there will be 15 of us!

This is the Easter card I sent out to family and friends this year. It uses the Papertrey Everyday Scene dies and Easter Alleluia stamp set.
 These are the jars filled with M&Ms. I was going to make one for each person, but soon discovered each one was quite a bit of work, so I settled for one for each family. That meant I ended up with alot of M&Ms leftover, so I made the large jar to keep here at Gramma's for the grandkids when they come. :) I used the new Papertrey Petite Places Sweet Shoppe and church dies and stamps as well as some of the Everyday Scene dies.


 This is a little bunny box made from a file I purchased from the Silhouette store and cut out with my Silhouette.
 These carrots are a Lettering Delights cut file and were cut out on my Silhouette. Each one is filled with M&Ms (told you I had alot!) and will go at each place setting. The name tags are tags from Papertrey Tremendous Tags dies.

I made a batch of cupcakes for our dessert. It is a yellow cake mix, with green grass icing and gummy carrots. I printed and cut the labels with my Silhouette.

Hope you have enjoyed these goodies - and I hope my family enjoys them too! Hope you have a blessed Easter!