

The first thing I did was to fuse some of the Pellon Vinyl Fuse to the piece of fabric I wanted to use for the sewing kit. Then I used the Lunchbox Die to cut the fabric.

I then used one of the shorter Stitching Lines dies to cut holes where the two larger pieces fold.
I then cut out two coordinating pieces of Papertrey felt sized 2 1/4" x 3 1/2". I then diecut the holes about 1" in from one end of the felt using the Stitching Lines die again.


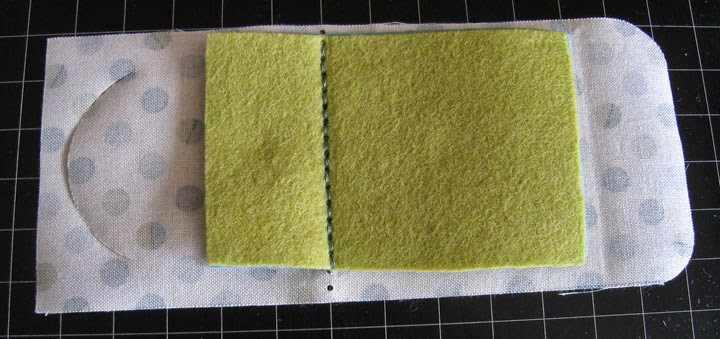
I then lined up all three lines of holes - the two layers of felt on the top and the lunchbox diecut fabric on the bottom, wrong side up.
I then stitched through all three layers using a back stitch and coordinating thread.


I added a small piece of stick-on Velcro to the top and bottom of the outer layer of vinyl fabric for a closure. I would have used a Velcro dot if I had one, but I didn't, so I just used a bit of what I had.


I would recommend using Fray Check around the edges of the fabric to prevent fraying. That would also be a good idea on the edges of any fabric coin purses you make. It's available at any of the big box fabric stores in the notions section. It's clear and doesn't show at all when it is dry.

I'm going to make a bunch of these to give out to my friends and my daughters. They are always handy. One more thing I might add is a safety pin or two clipped on to the page that had the needle. Thanks for looking!
How very clever of you! These little kits are so cute and very practical. I actually searched for one recently while packing for a trip and I can tell you they are nearly impossible to find to purchase. This is a great example of the creativity inspired by PTI innovative products! Thanks for the sharing! (The one I have also has an aluminum needle threader...with my eyes a must 😉
ReplyDeleteThe needle threader would be a great addition. I think you can pick them up pretty cheap in the notions section. It would probably nestle nicely on the same page as the thread. The only other thing I could think to add would be a tiny pair of scissors, but couldn't figure out how to do that safely.
DeleteVery creative idea Susan! Love it!
ReplyDeleteGreat tutorial. Thanks for sharing.
ReplyDelete